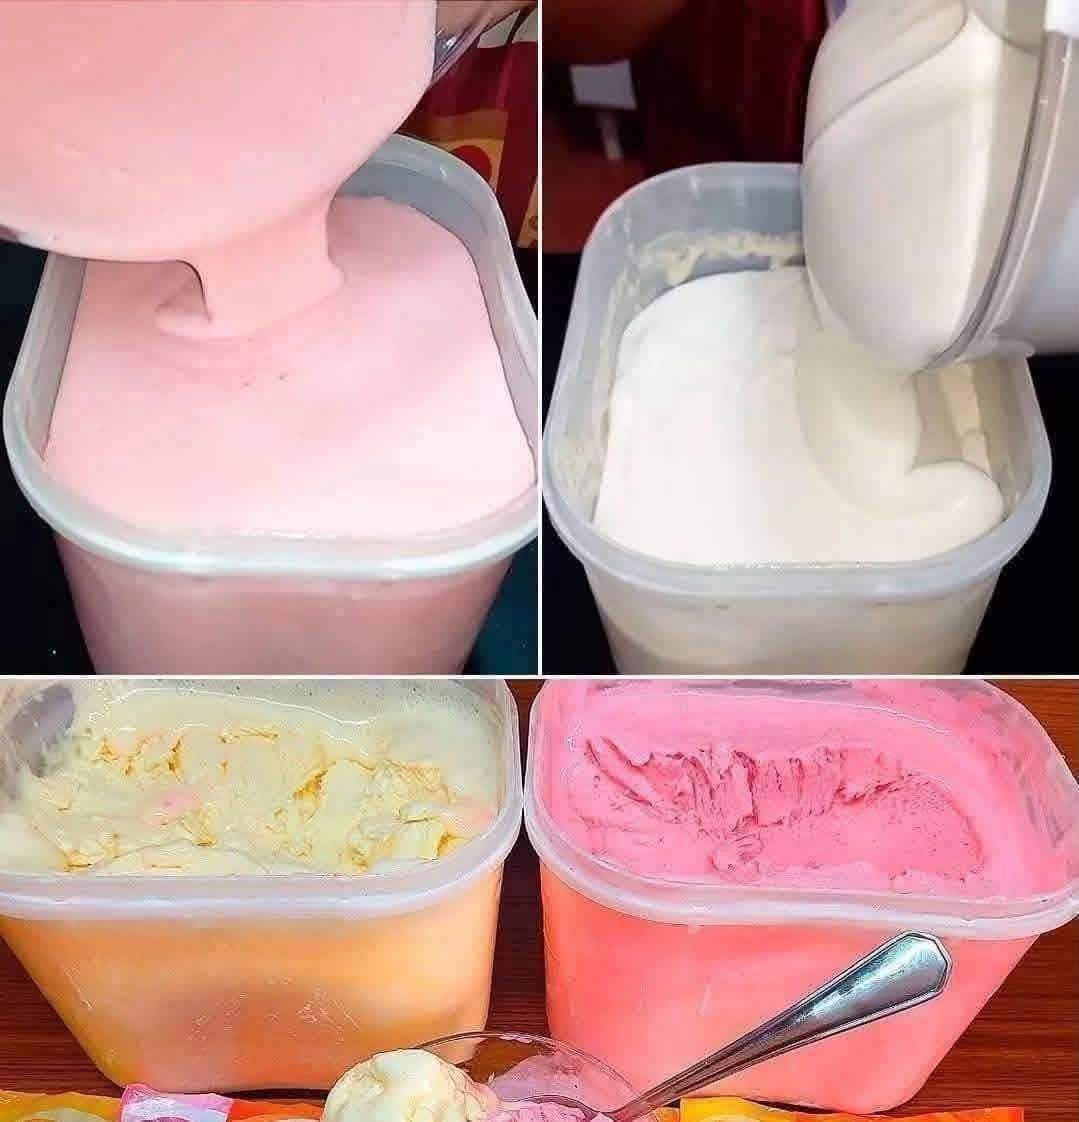
Article: The Best No-Churn Ice Cream (Creamy, Dreamy & So Easy!)
Have you ever wanted to make homemade ice cream but thought you needed a fancy $100 machine? Think again. This No-Churn Ice Cream recipe requires only 3 simple ingredients and a hand mixer.
The secret to this incredibly creamy texture is a technique called “whipping the cream”. By whipping heavy cream to stiff peaks and folding it into sweetened condensed milk and flavoring, you trap tiny air bubbles into the base. As it freezes, these bubbles remain intact, creating a smooth, dense, and velvety ice cream without any of the icy crystals you get from homemade recipes that just freeze milk and sugar.
Why you’ll love this recipe:
· ✅ No Ice Cream Maker: All you need is a mixing bowl and a hand mixer.
· ✅ Creamy Perfection: Rich, dense, and smooth—just like the bottom photos.
· ✅ 3 Ingredients: A simple base that you can easily customize.
· ✅ Endless Flavors: Add fruit puree, chocolate chips, cookies, or extracts.
Full Recipe: 3-Ingredient No-Churn Ice Cream (Vanilla & Strawberry)
Prep Time: 15 minutes
Freeze Time: Minimum 6 hours (or overnight)
Yield: 1 large tub (about 1.5 quarts / 1.5 liters)
📝 Ingredients
For the Vanilla Base (The white tub):
· Heavy Cream (Double Cream): 2 cups (480 ml), cold.
· Sweetened Condensed Milk: 1 can (14 oz / 397g).
· Vanilla Extract: 2 teaspoons.
For the Strawberry Base (The pink tub):
· Heavy Cream (Double Cream): 2 cups (480 ml), cold.
· Sweetened Condensed Milk: 1 can (14 oz / 397g).
· Strawberry Puree: ½ cup (make this by blending 1 cup of fresh or frozen strawberries until smooth. Strain out the seeds if you prefer).
· Pink Food Coloring: A few drops (optional, purely for the color seen in the photo).
🥣 Instructions
Step 1: Whip the Cream (Crucial for the texture in the bottom photo)
- Place a large mixing bowl and your hand mixer beaters in the freezer for 10 minutes. Cold equipment helps the cream whip faster.
- Pour the cold heavy cream into the chilled bowl.
- Whip on medium-high speed for 3 to 5 minutes until stiff peaks form. (When you lift the beaters, the cream should stand up straight without flopping over).
Step 2: Prepare the Flavor Base
- In a separate large bowl, combine the can of sweetened condensed milk with your flavoring.
- For Vanilla: Mix the condensed milk with the vanilla extract.
- For Strawberry: Mix the condensed milk with the ½ cup of strawberry puree (and food coloring if using).
Step 3: Fold the Cream Together (Top photos)
- Using a rubber spatula, gently fold one large scoop of the whipped cream into the condensed milk mixture to lighten it.
- Pour the rest of the whipped cream into the bowl and gently fold it in. Do not stir aggressively. Gently go around the sides and cut through the center until the mixture is completely uniform and smooth. It should look like a thick, pourable mousse (just like the top photos!).
Step 4: Pour and Freeze
- Pour the finished mixture into a freezer-safe container (like the plastic tubs shown in the photo). Smooth the top with the spatula.
- Place a piece of plastic wrap directly onto the surface of the ice cream (this prevents ice crystals from forming on top).
- Put the lid on the tub and freeze for at least 6 hours (or overnight).
Step 5: Scoop and Serve (Bottom photos)
- Remove from the freezer and let it sit at room temperature for 5 to 10 minutes before scooping. This allows it to soften slightly to the perfect, creamy, scoopable texture shown in the bottom photos.
- Scoop and enjoy with your favorite toppings!
💡 Chef’s Pro Tips:
· The Secret to Smoothness: The whipped cream is the key. Make sure you whip it to stiff peaks. If you under-whip it, the ice cream will be runny. If you over-whip it, it will turn into butter. Stop exactly when it forms firm peaks.
· Add Mix-ins: For a truly gourmet ice cream, fold in ½ cup of chocolate chips, crushed cookies (like Oreos or Biscoff), or chopped nuts during Step 3, right before pouring it into the tub.
· No Strawberry Puree? You can easily replace the puree with ½ cup of melted peanut butter, ½ cup of Nutella, or 2 tablespoons of cocoa powder for other delicious flavors.
· Make it Dairy-Free: Use canned full-fat coconut cream (chilled) instead of heavy cream, and use a dairy-free sweetened condensed milk substitute (available in most grocery stores). The process is exactly the same!