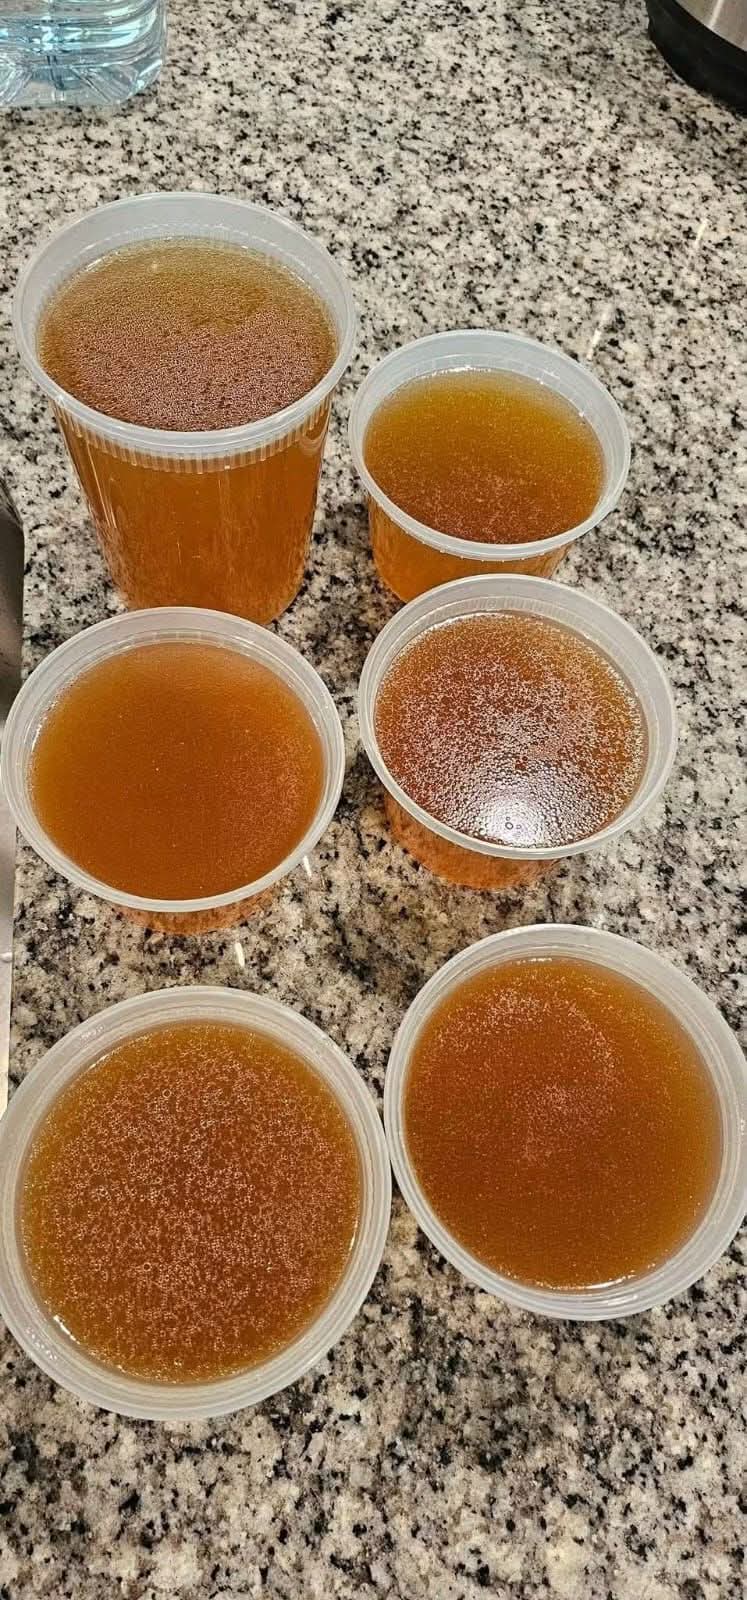
If you have ever bought a carton of beef broth from the store, you know it can be convenient, but it often lacks the deep, rich, savory flavor of real homemade stock. This image represents “liquid gold”—a rich, gelatinous beef bone broth that is packed with nutrients, collagen, and intense flavor.
Making bone broth at home is a simple, albeit lengthy, process. It requires just three main components: bones, water, and time. The long, slow simmering process extracts all the collagen, minerals, and amino acids from the bones, resulting in a broth that solidifies like jelly when cold (a sign of a truly great broth). It’s the perfect base for soups, stews, risottos, and gravies, or simply to sip on its own for a health boost.
Why you’ll love this recipe:
· ✅ Superior Flavor: Deeply savory and rich, far better than store-bought.
· ✅ Nutrient-Dense: Packed with collagen, gelatin, and minerals.
· ✅ Thrifty: A great way to use up leftover bones and vegetable scraps.
· ✅ Freezer-Friendly: Make a big batch and freeze it for months.
Full Recipe: Rich Homemade Beef Bone Broth
Prep Time: 15 minutes
Roast Time: 45 minutes
Simmer Time: 8 to 24 hours
Yield: About 4-6 quarts of broth
📝 Ingredients
For the Broth:
· Beef Bones: 4-5 lbs (1.8-2.2 kg). Use a mix of marrow bones, knuckle bones, and oxtail for the best flavor and gelatin.
· Cold Water: 4-6 quarts (enough to cover the bones by 2 inches).
· Apple Cider Vinegar: 2 tablespoons. This helps draw the minerals out of the bones.
· Onion: 1 large, roughly chopped (leave the skin on for color!).
· Carrots: 2 large, roughly chopped.
· Celery: 3 stalks, roughly chopped.
· Garlic: 1 whole head, halved horizontally.
· Fresh Herbs: A handful of fresh parsley, thyme, and 2 bay leaves.
· Black Peppercorns: 1 tablespoon.
🥣 Instructions
Step 1: Roast the Bones (The Flavor Step)
- Preheat your oven to 400°F (200°C).
- Spread the beef bones out in a single layer on a large baking sheet.
- Roast the bones for 45 minutes, turning them once halfway through. They should be deeply browned. This step is crucial for developing the deep, rich color and flavor you see in the photo.
Step 2: Combine in a Large Pot
- Transfer the roasted bones to a large stockpot or a slow cooker.
- Add the chopped onion, carrots, celery, garlic, peppercorns, and the bay leaves.
Step 3: Add Water and Vinegar
- Pour the 2 tablespoons of apple cider vinegar over the bones.
- Add enough cold water to completely cover the bones by at least 2 inches. It’s important to have enough water, as it will evaporate during the long simmer.
Step 4: The Long Simmer (The Magic Step)
- Bring the pot to a gentle boil over high heat.
- Once boiling, immediately reduce the heat to low.
- Cover the pot with a lid, leaving it slightly ajar to allow a tiny bit of steam to escape.
- Let it simmer for 8 to 24 hours. The longer it simmers, the richer and more gelatinous the broth will be. (If using a slow cooker, cook on low for 12-24 hours).
Step 5: Skim and Strain
- Every few hours, use a spoon to skim off any foam or scum that rises to the surface. This keeps the broth clear.
- Once the broth is done, turn off the heat.
- Carefully strain the broth through a fine-mesh sieve into a large bowl or pot. Discard the bones and vegetables.
Step 6: Cool and Store
- Let the broth cool to room temperature, then transfer it to the refrigerator overnight.
- The next day, the fat will have risen to the top and solidified. You can skim this fat off and save it (it’s called tallow and is great for cooking!).
- The remaining liquid should be thick and gelatinous (like Jell-O) when cold. This is the sign of a perfect bone broth!
- Transfer the broth into portion-sized containers (like the plastic deli containers shown in the photo) and refrigerate for up to 5 days, or freeze for up to 6 months.
💡 Chef’s Pro Tips:
· The Vinegar is Key: Don’t skip the apple cider vinegar. The acid helps break down the collagen and extract the minerals from the bones into the water.
· Keep it Simmering, Not Boiling: A rolling boil will make the broth cloudy and emulsify the fat. You want a very gentle simmer to keep it clear.
· The “Jiggle Test”: If your broth doesn’t gel when cold, it means you didn’t use enough gelatinous bones (like knuckles) or didn’t simmer it long enough. It will still be delicious, just more liquid.
· Skimming Matters: For a clean-tasting, clear broth, skim the foam every few hours.
· The Foam in the Photo: The foam you see on top of the containers in the photo is normal. It’s a mix of tiny air bubbles and proteins from the long simmer. It will settle or can be skimmed off before use.